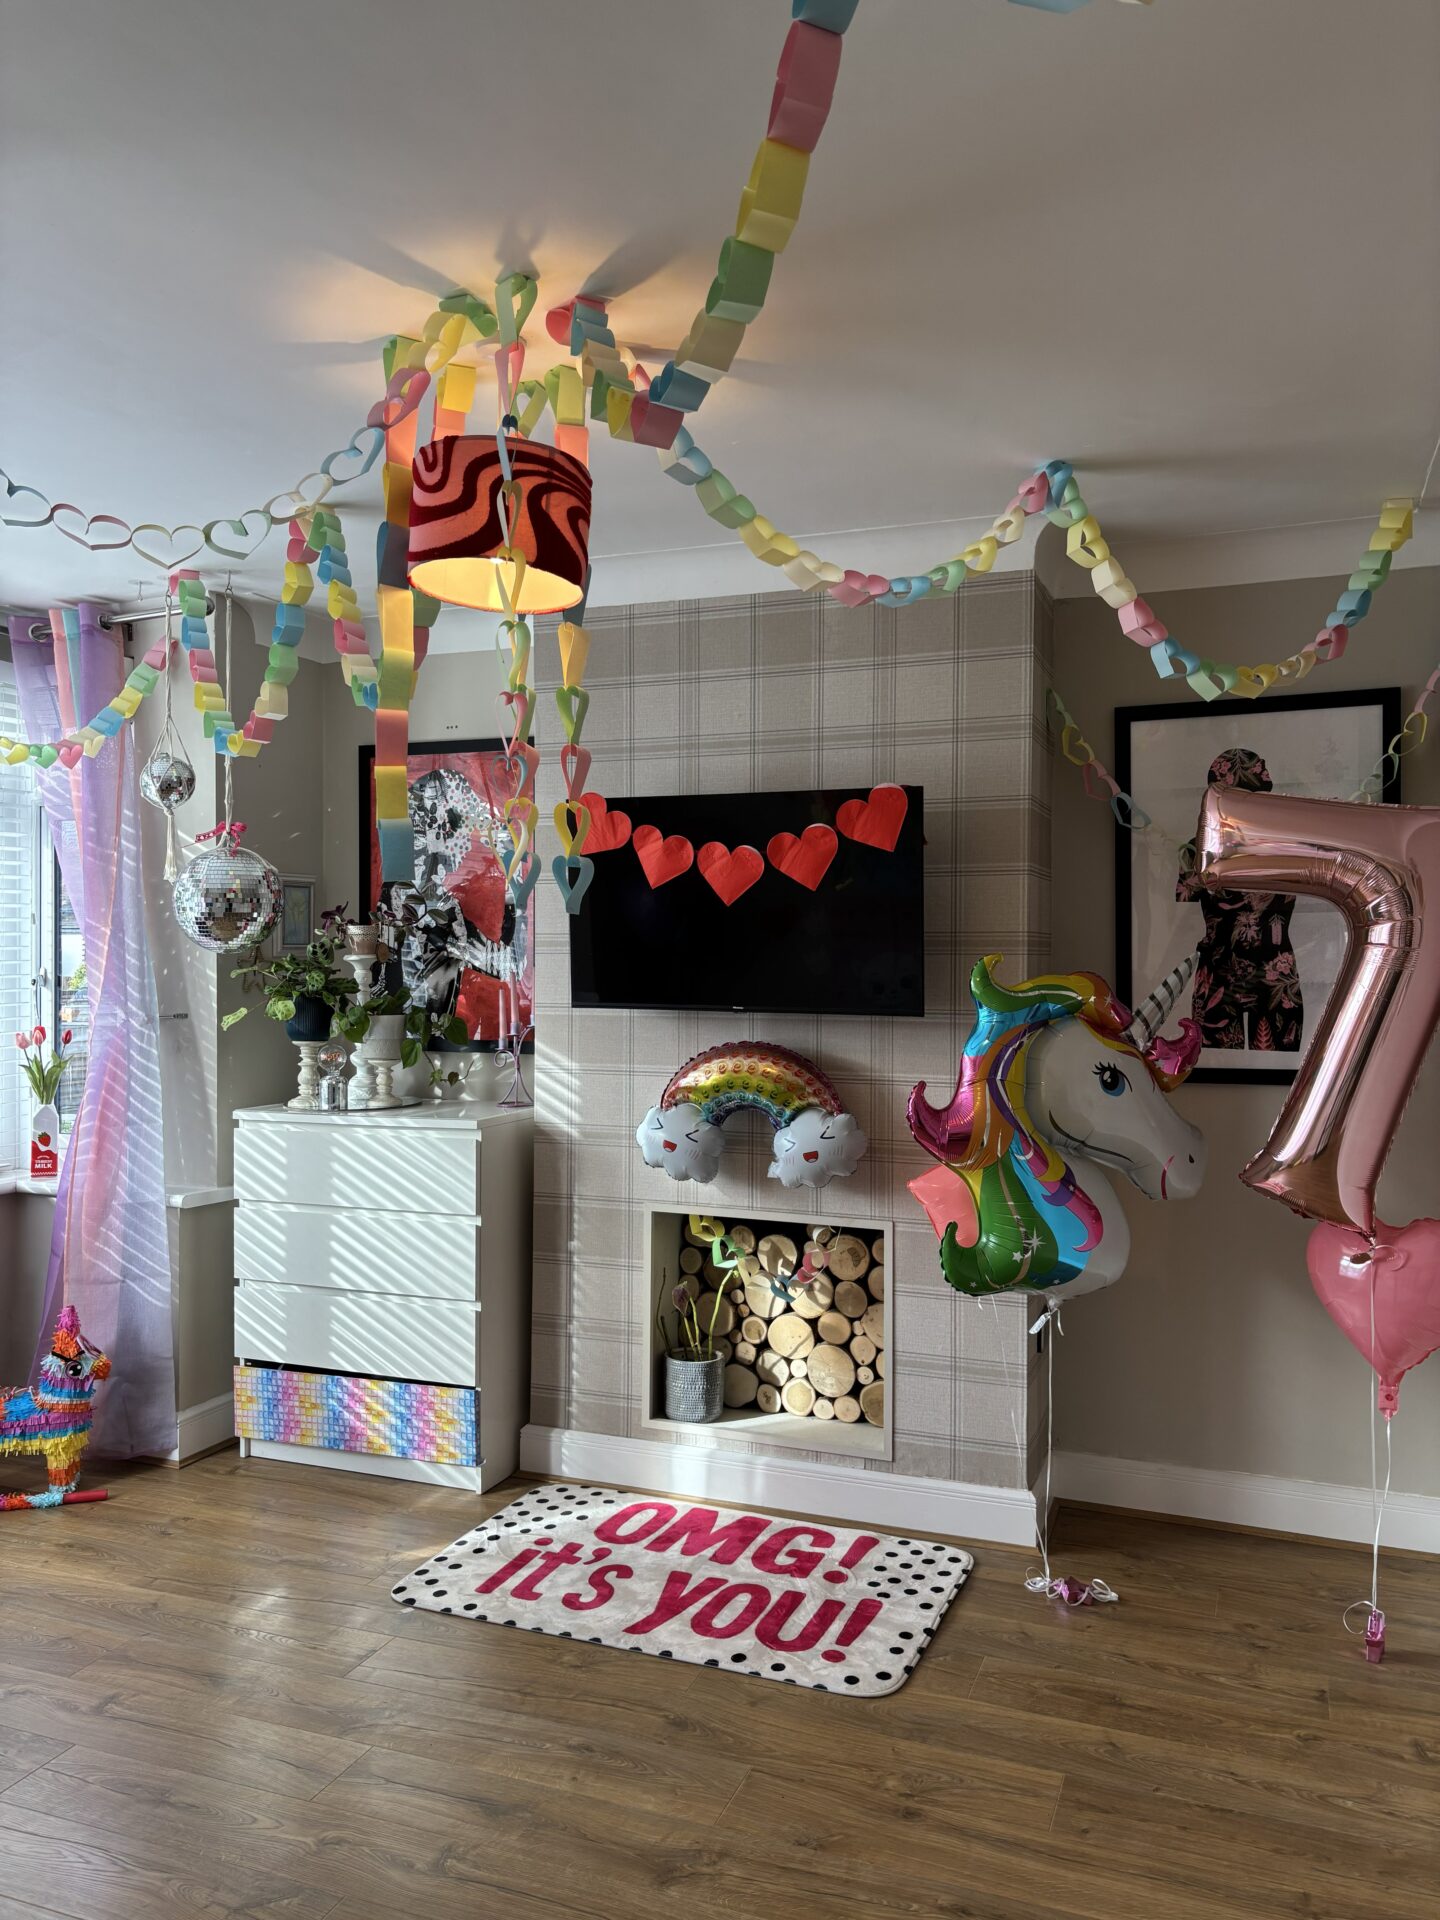
Paper decorations are the ultimate low-effort, high impact craft. They’re budget friendly, easy to make and instantly make a space feel more fun… whether you’re decoration for a party, a classroom or just adding a little colour to your home.

In this step-by-step guide, I’m sharing some simple DIY paper decorations anyone can make, from classic paper chains to paper heart garlands, shamrocks and rainbows. You don’t need fancy tools or crafting experience, just a few basic supplies and a little time.
- What you’ll need
- Classic paper chains
- Paper heart garland
- Paper shamrock garland
- Paper cherries garland
What you’ll need
The best thing about DIY paper decoration is how little you actually need. Most of the supplies you’ll already have in a drawer at home. Here’s what you’ll need to get started:
- Coloured paper or card
- Scissors
- Stapler (this one is highly effective for speed an sanity)
- OR a hot glue gun (optional, if you’re prepared to burn your fingers 300 times)
- Pencil (this is also optional, most of the linework can be done by simple folding)
- String, thread or tape (for hanging the decorations)
Optional but helpful:
- Ruler (for even strips)
- Paper cutter (for batch cutting if you want to save some time)
- Double sided sticky tape
Let’s Start Easy: Classic Paper Chains

If you’ve ever decorated a classroom or made party decor as a child, you’ve probably made paper chains before. They’re simple, colourful and surprisingly effective – especially when you play with colour combinations. This is the perfect decoration to start with because it’s quick, beginner-friendly and easy to customise.
Step-by-Step Instructions
- Cut your paper into strips around 2–3cm wide. The length can vary depending on how large you want your loops, but I prefer to use shorter strips of paper for a more compact look.
- Take your first strip and form it into a loop. Secure it with a staple (or glue).
- Thread your second strip through the first loop.
- Form it into a loop and secure it again.
- Repeat this process, linking each new strip through the previous loop, until your chain reaches your desired length.
That’s it – genuinely one of the easiest DIY paper decorations you can make.


Paper Heart Garland
Paper heart garlands are one of the most versatile DIY paper decorations you can make. They work for Valentine’s Day decor, baby showers, birthday parties or even just adding a soft decorative touch to a space.
Step-by-Step Instructions
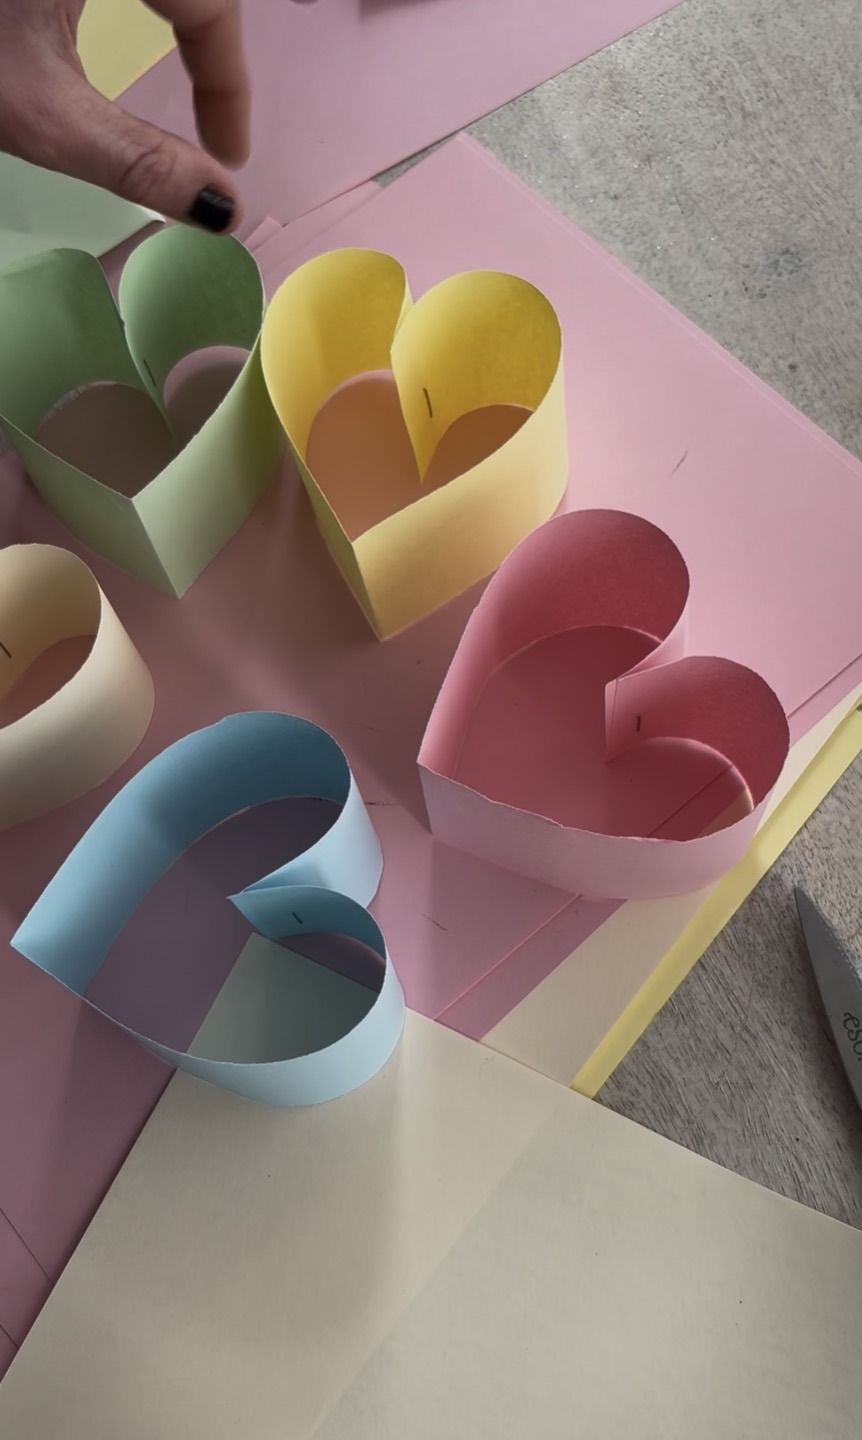
- Cut your paper into strips, roughly 2–3cm wide. The length of the strip will determine the size of your heart.
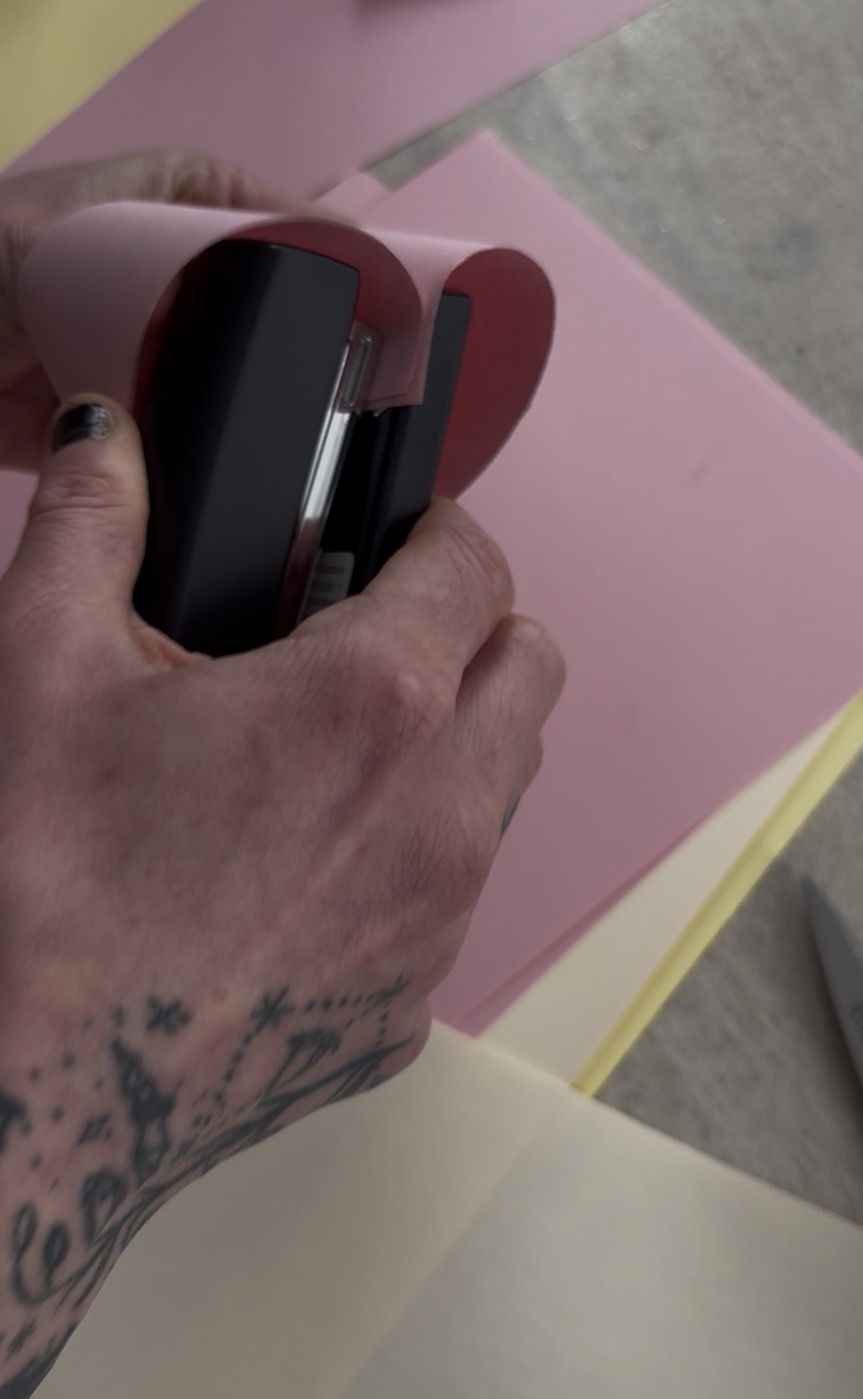
- Take one strip and fold it in half – this fold will become the bottom point of your heart.
- Holding the folded end at the bottom, gently curl both loose ends inward toward each other to form the top curves of the heart.
- Once the two ends meet at the top, staple them together to secure the shape… you should now have one complete paper heart.
- Repeat this process to create multiple hearts.
- To turn them into a garland, line two hearts up side by side and staple them together at the “fat” top section.
- Continue attaching hearts until you reach your desired length.


Styling Tips
- Use alternating colours for a playful look
- Stick to one colour palette for something more grown-up
- Try pastel shades for baby showers
- Create an ombré effect by gradually changing tones
- Hang vertically for a curtain-style backdrop
This design works beautifully because the hearts naturally drape once connected, creating movement without needing string or thread.
Paper Shamrock Garland

DIY paper shamrocks use the exact same technique as the paper hearts, which makes it quick to assemble once you’ve made one. It’s perfect for St Patrick’s Day, spring parties or classroom decor – and looks much more intricate than it actually is.
Step-by-Step Instructions
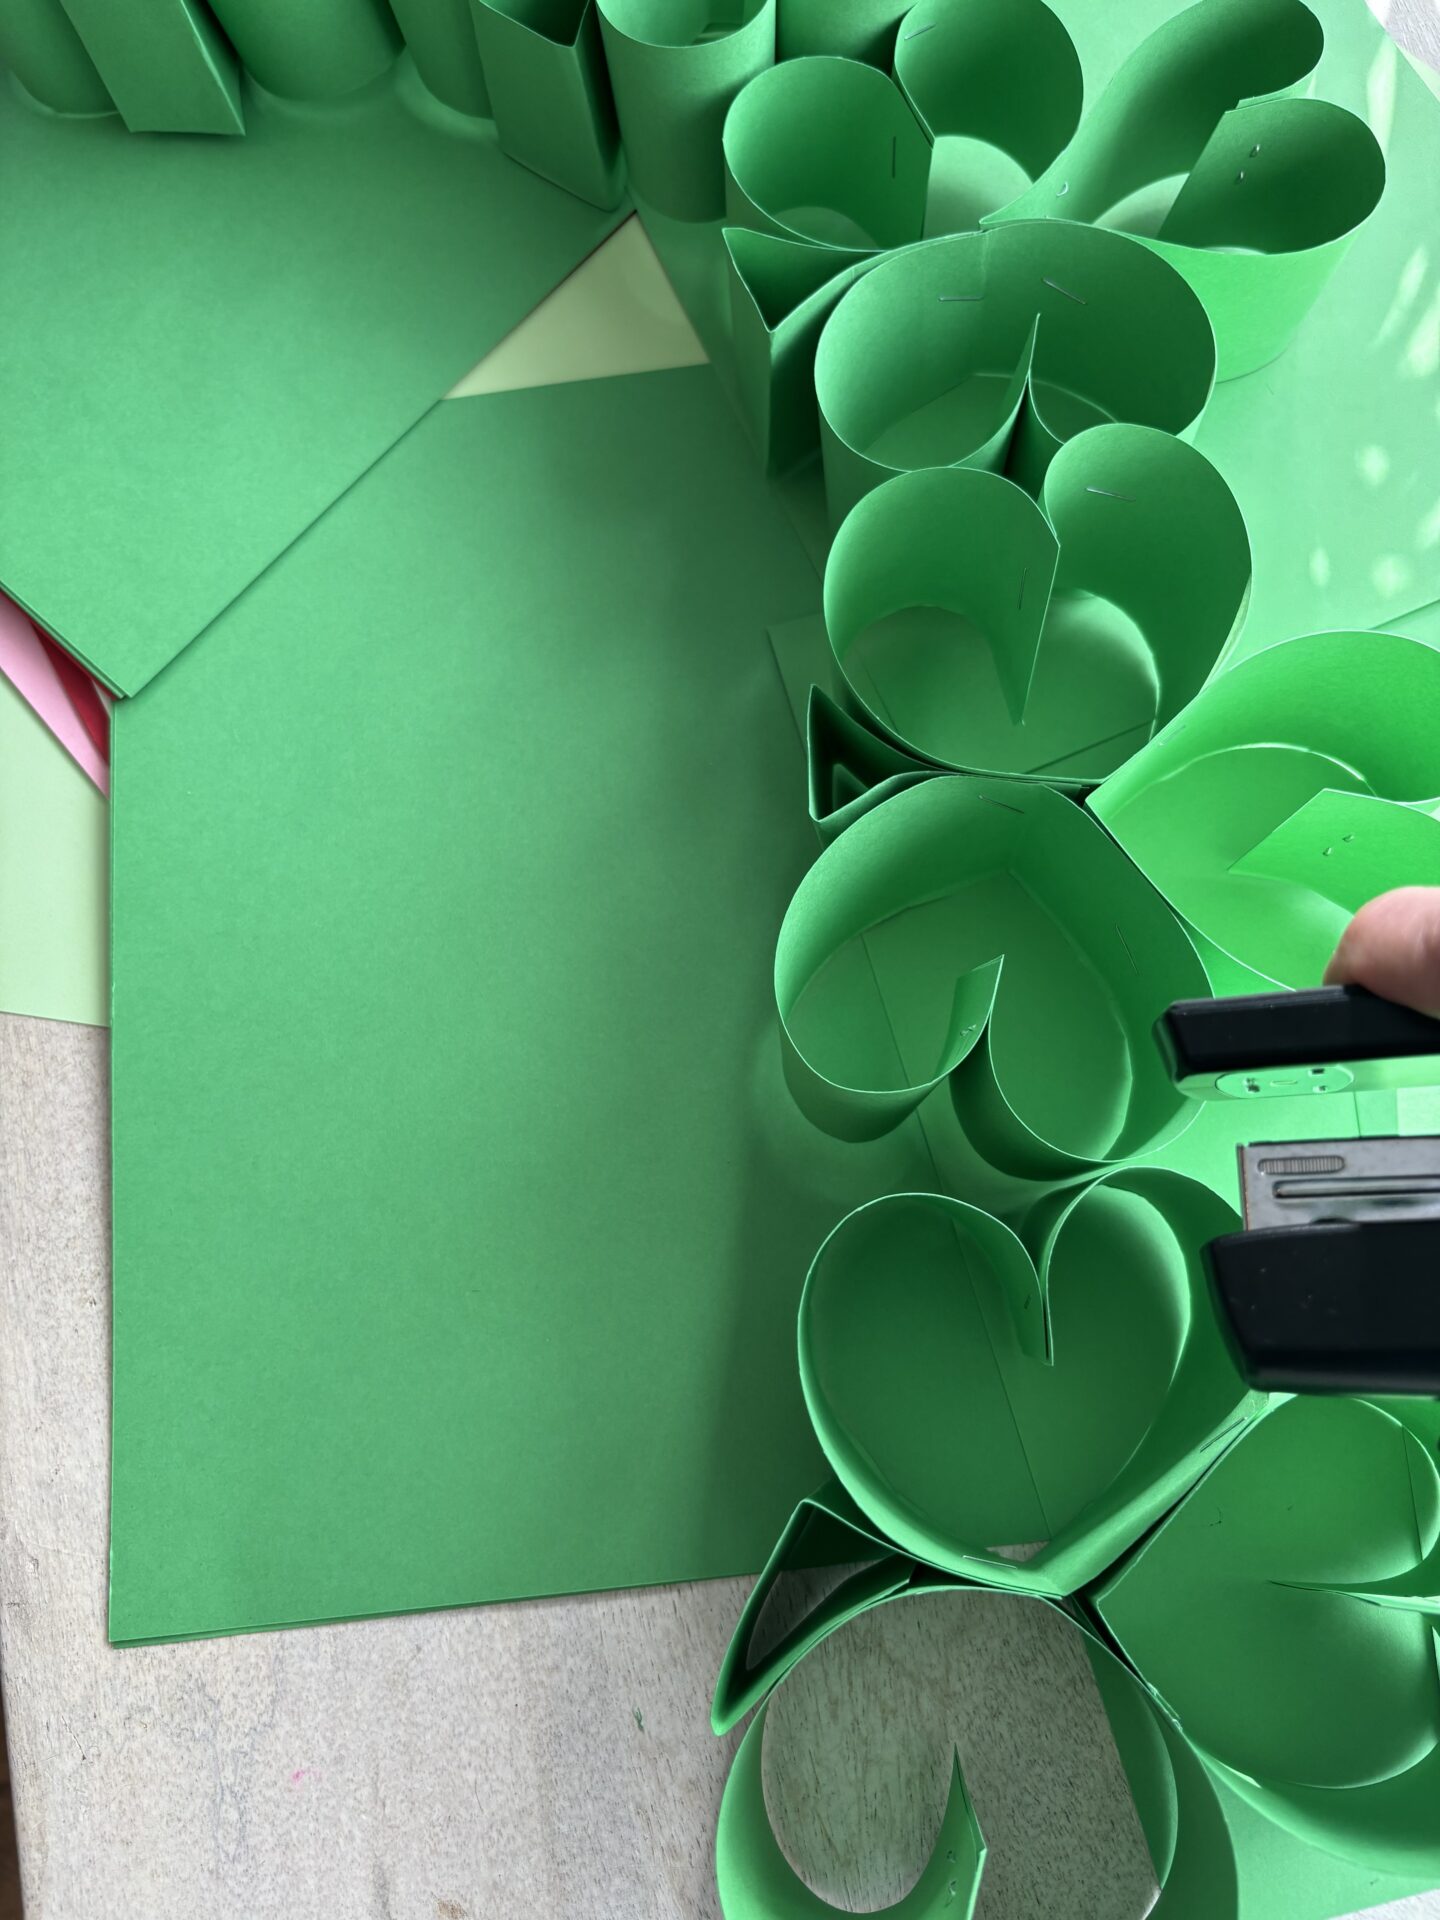
- Cut your green paper into strips, roughly 2–3cm wide.
- Take one strip and fold it in half – this fold will create the bottom point of your heart shape.
- Curl the two loose ends inward toward each other to form the top curves.
- Staple the ends together at the top to create one heart shape.


Repeat this until you have three individual hearts.
- Arrange the three hearts so their pointed ends meet in the centre, forming a shamrock shape.
- Staple them together where they meet in the middle to secure the shape.

Now for the stem:
- Take one smaller strip of green paper and attach it to the bottom centre of the shamrock using a staple. You can leave it straight or gently curve it for a more natural look.


You now have one paper shamrock.
- To turn them into a garland, staple each shamrock to the next at the side edge of one leaf.
- Continue attaching until you reach your desired length.
Styling Tips
- Mix different shades of green for a layered look
- Add gold paper strips for a festive touch
- Create smaller shamrocks and layer them between larger ones
- Pair with rainbow paper chains for a full St Patrick’s day themed backdrop
Because each shamrock is slightly dimensional, they drape beautifully when connected – making them ideal for walls, doorways or party tables.
Paper Cherry Garland
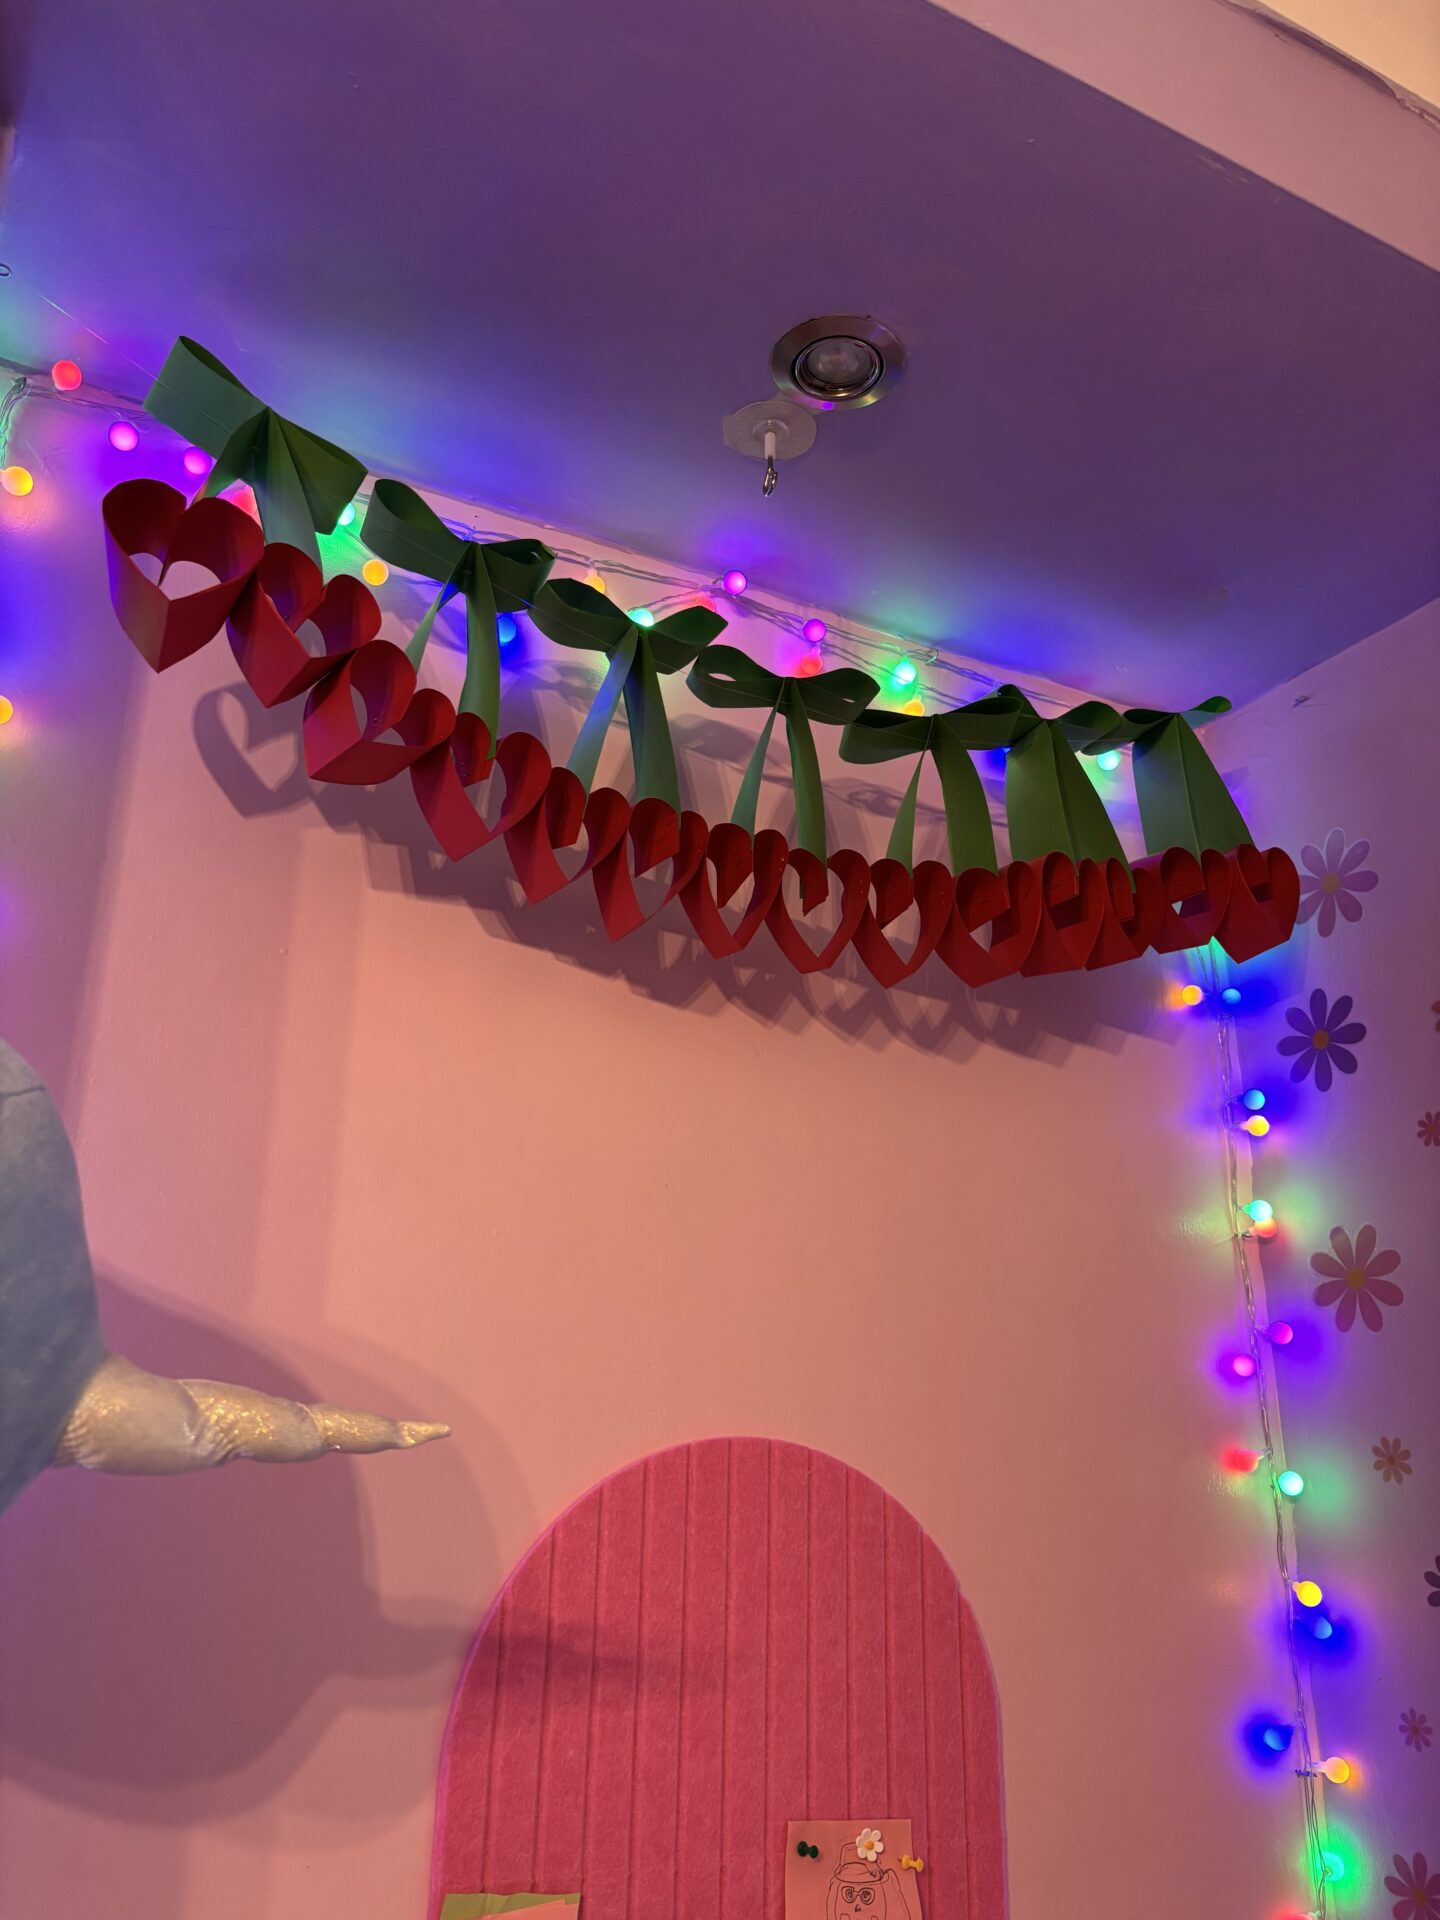
If you want something playful and a little different, paper cherries are such a fun twist on traditional party decor. They’re bright, slightly retro and perfect for summer parties, birthdays or kitchen-themed decor.
This design builds on the same heart technique you’ve already used – so once you’ve made one, the rest come together quickly.
Step-by-Step Instructions
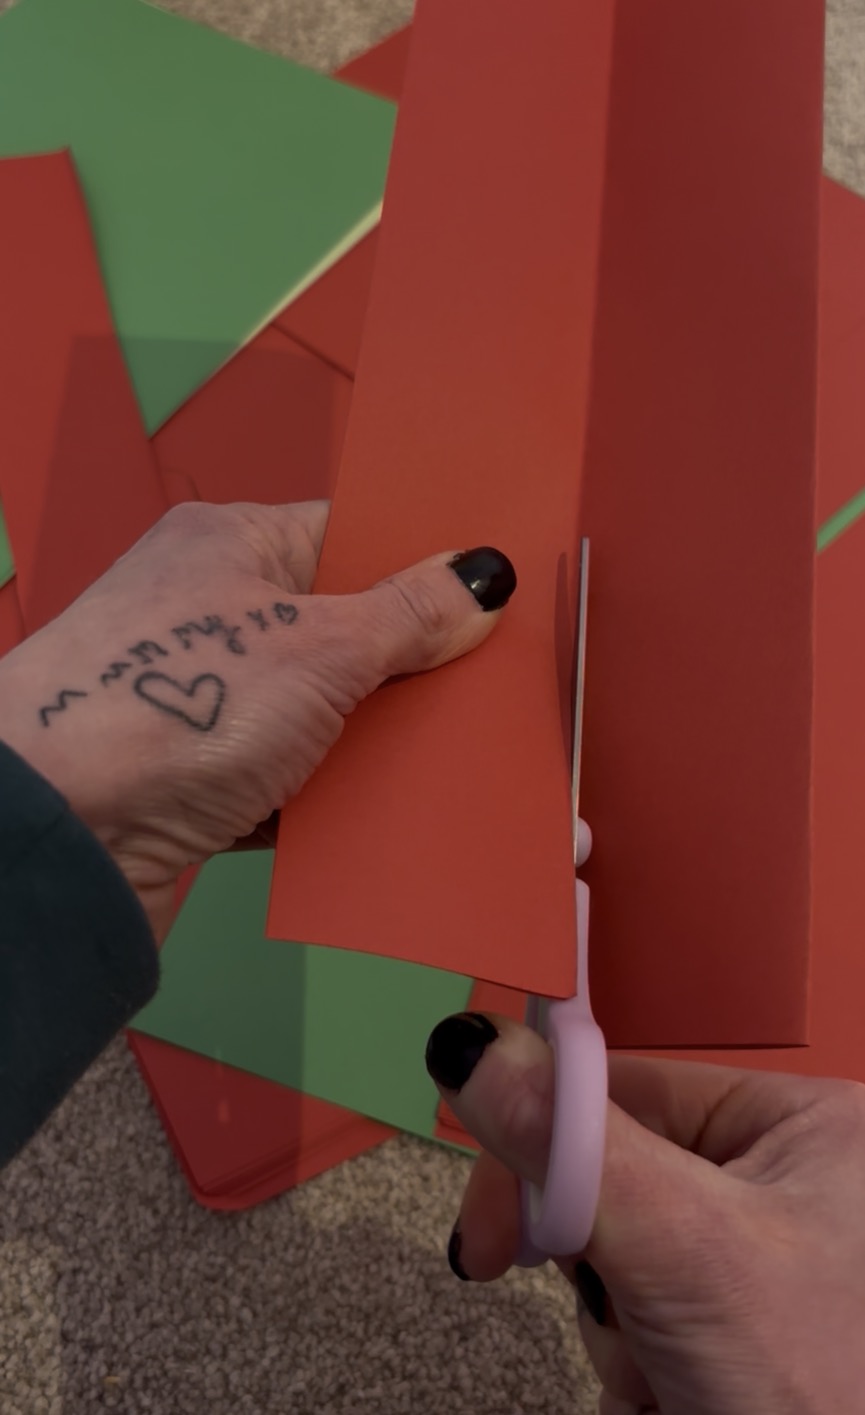
Step 1: Make the Cherry Shapes
- Cut two strips of red or pink card.
- Fold each strip in half to create the bottom point.
- Curl the loose ends inward and staple at the top to form two heart shapes.
These will become your cherries.


Step 2: Create the Stem
- Cut a strip of green paper and fold it in half.
- This fold becomes the top of the stem, with the two loose ends hanging down.
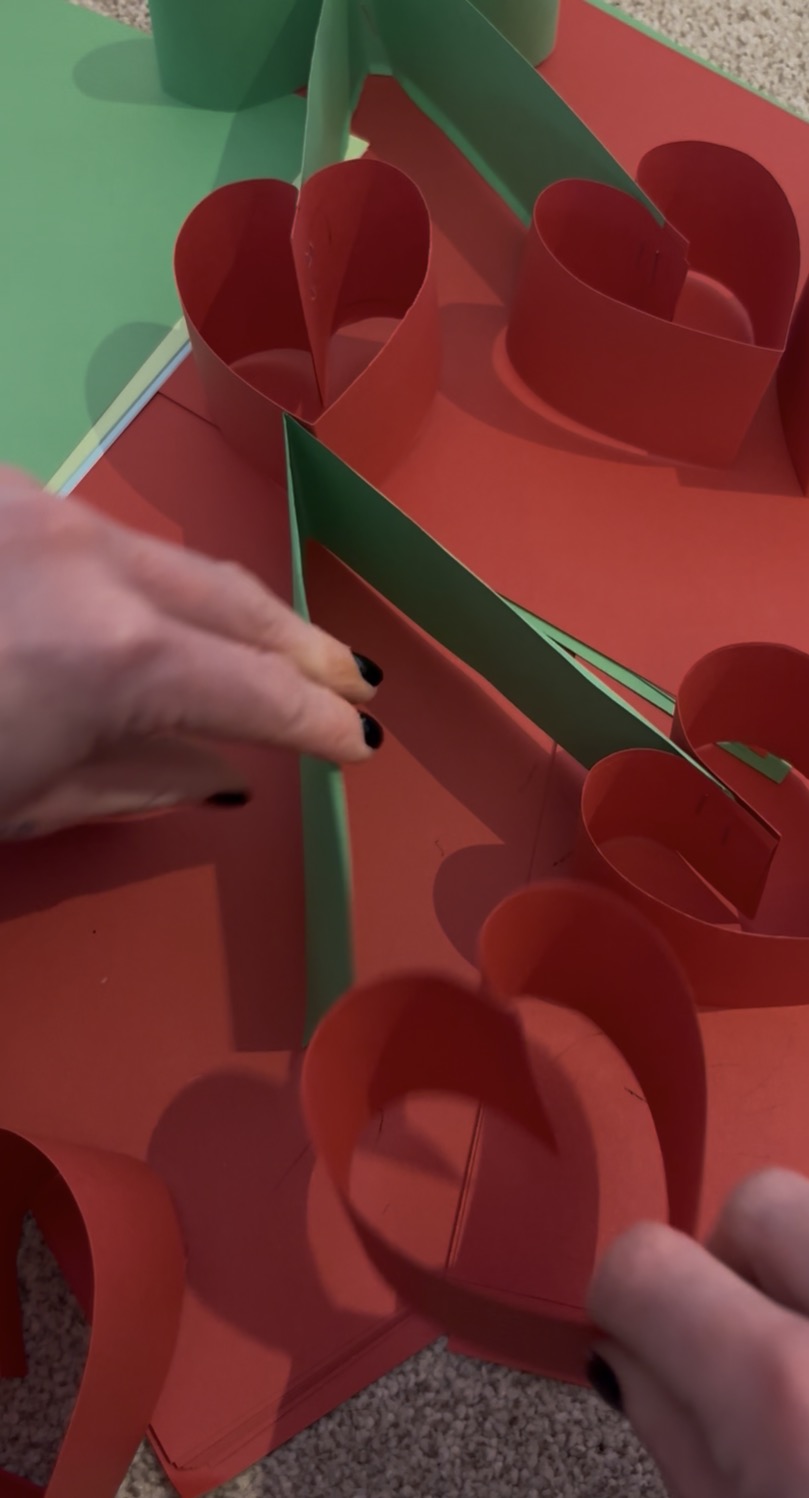
Step 3: Attach the Cherries
- Staple one heart to one loose end of the green stem.
- Staple the second heart to the other loose end.
You should now have a pair of cherries connected by a folded green stem.

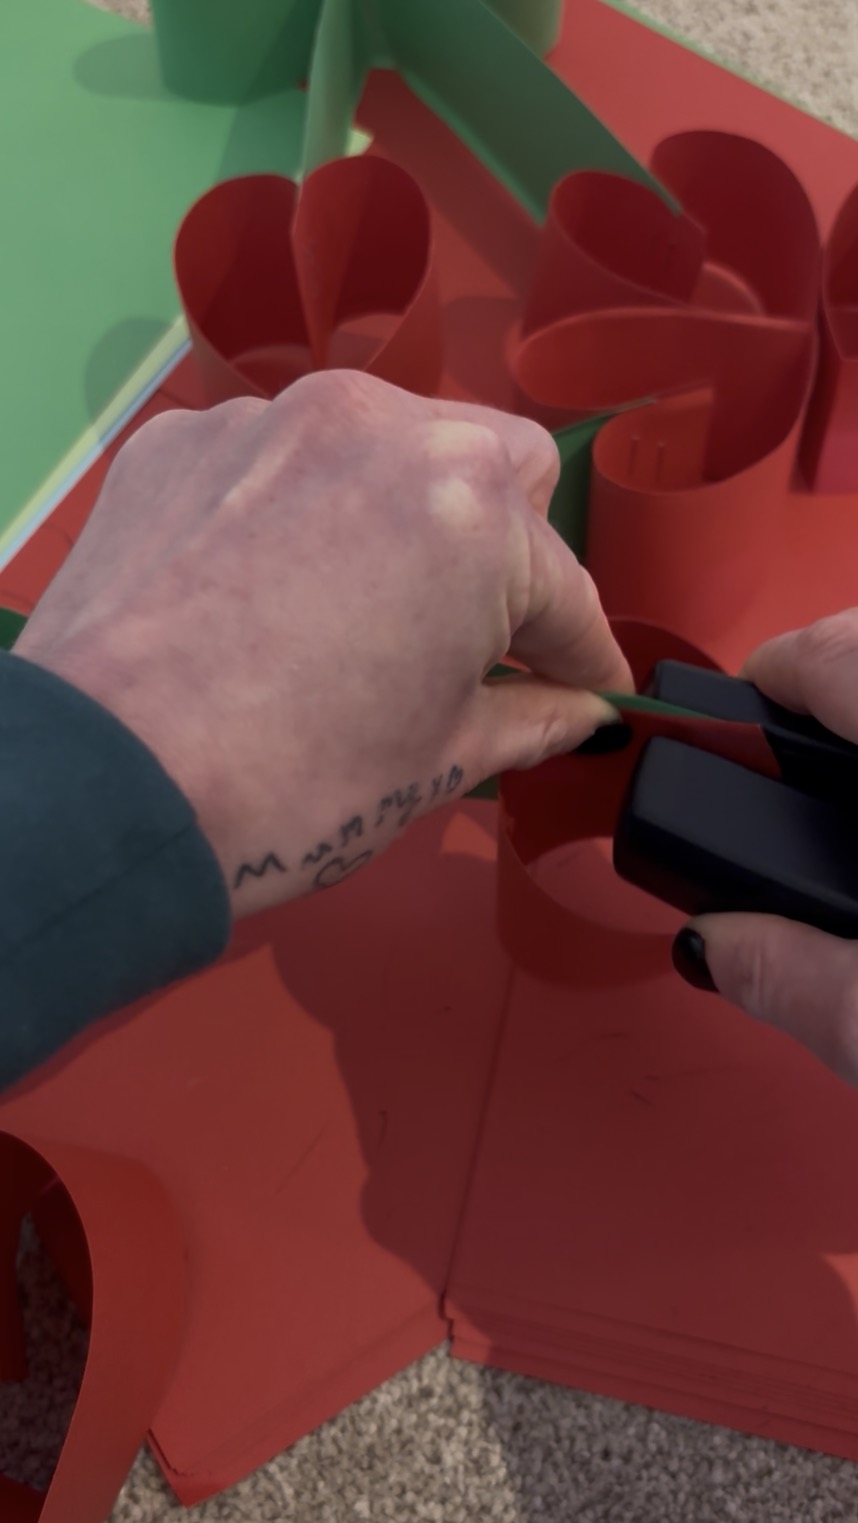
Step 4: Make the Bow
- Take another strip of green paper and fold it in half.
- Fold each loose end inward toward the centre.
- Staple in the middle to create a simple bow shape.


Step 5: Attach the Bow
- Staple the bow to the top fold of the stem to finish your cherry design.
You now have one complete paper cherry.


Turning It Into a Garland
- Line your cherries up side by side.
- Staple the bows together at the edges to connect them into a chain.
- Continue until you reach your desired length.

Styling Tips
- Mix red and pink cherries for a softer look
- Use patterned paper for a playful summer vibe
- Add small green leaves behind the bow for extra detail
- Pair with paper rainbows or hearts for a colourful party backdrop
Because the cherries have multiple layers, they naturally add dimension and movement once connected – which makes them especially eye-catching when hung along a wall or above a party table.
DIY paper decorations are proof that you don’t need complicated tools or a big budget to create something joyful. With just paper, scissors and a stapler, you can transform a space for a party, classroom or seasonal celebration in an afternoon. Whether you start with simple paper chains or go all in with cherries and rainbows, these decorations are easy to customise, fun to make and surprisingly effective once styled together. Start small, get creative and don’t overthink it, even do it with your kids – sometimes the simplest crafts make the biggest impact.

TDS Editor, and resident witch.
I share witchy tips, home and garden renovation ideas, and fun places me and my daughter have been on our travels.
Follow me on TikTok @scarlet.wonderland

